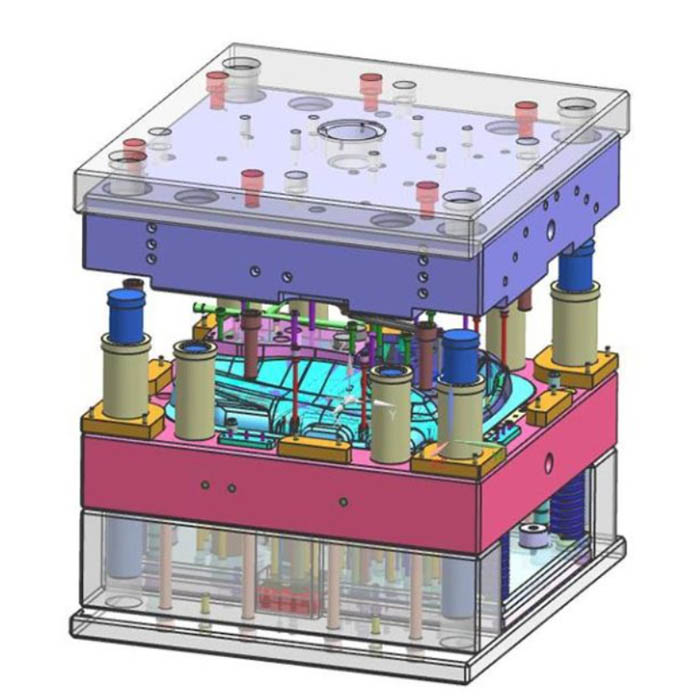
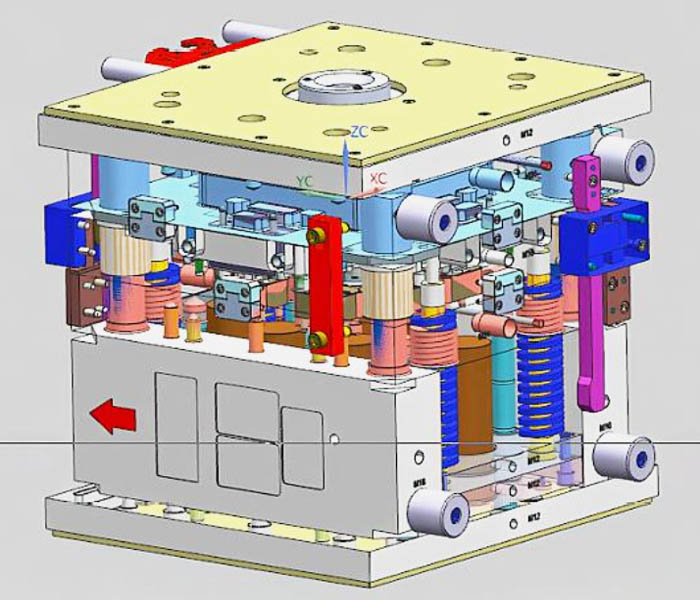
Guide to Plastic Mould Design Steps,when designing a plastic mold, following a series of steps will ensure you get a high quality plastic injection mold that will produce the plastic part you intended. In this article, we will introduce you to some key steps of plastic mold design to help you better understand the process.
Table of Contents
Toggle
Guide to Plastic Mould Design Steps
1. Determine project requirements
Before starting to design, you must first clarify the needs of the project. This includes understanding the specifications, quantities, quality requirements of the plastic parts required and the requirements during manufacturing and assembly.
2. Material selection
Choosing the right plastic material for your project is important because different plastic materials have different physical properties and durability.
3. Product design
Before proceeding with mold design, the plastic parts product to be produced must be designed. This includes determining the size, shape, structure and characteristics of the part.
The task list for forming plastic parts products are usually proposed by the product part designer, and its contents are as follows:
(1). Drawings of formal parts product that have been reviewed and signed, and indicate the grade and transparency of plastic used.
(2). Instructions or technical requirements for plastic parts product.
(3). Production volume.
(4). Samples of plastic parts products.
It needs well understand the use of the parts, and analyze the technical requirements such as the craftsmanship and dimensional accuracy of the plastic parts products.
For example, what are the requirements of plastic parts in terms of appearance, color transparency, and performance, whether the geometric structure, slope, and insert of plastic parts are reasonable, the allowable degree of welding marks, shrinkage holes and other forming defects, whether there is coating Assembly, electroplating, gluing, drilling and other post-processing. Select the dimension with the highest dimensional accuracy of the plastic part for analysis to see if the estimated molding tolerance is lower than the tolerance of the plastic part, and whether the plastic part that meets the requirements can be formed. In addition, it is necessary to understand the plasticization and molding process parameters of plastics.
4. Mold type selection
Based on the part design, select the appropriate mold type. Common mold types include injection molds, blow molds, extrusion molds or casting method, etc.
Specific structure plan
A. Determine the mold type
Such as pressing molds (open, semi-closed, closed), casting molds, injection molds, etc.
B. Determine the main structure of the mold type
The selection of the ideal mold structure is to determine the necessary molding equipment, the ideal number of cavities, and under absolutely reliable conditions, the work of the mold itself can meet the requirements of the technology and production economy of the plastic part. The technical requirements for plastic parts are to ensure the geometry, surface finish and dimensional accuracy of the plastic parts. The economic requirement of production is to make the cost of plastic parts low, the production efficiency high, the mold can work continuously, the service life is long, and labor is saved.
5. Mold design
When designing molds, factors such as cooling systems, feeding systems, exhaust systems, injection systems, etc. need to be considered to ensure that the mold can operate efficiently and achieve consistent part quality.
Usually, the mold design task list is proposed by the plastic part craftsman according to the task list for molding plastic parts, and the mold designer designs the mold based on the task list for molding plastic parts product and the mold design task list.
Digest the process data, and analyze whether the requirements for the molding method, equipment model, material specification, mold structure type, etc. proposed in the process task book are appropriate and whether they can be implemented.
The molding material should meet the strength requirements of plastic parts, and have good fluidity, uniformity, isotropy, and thermal stability. According to the purpose of the plastic part, the molding material should meet the requirements of dyeing, metallizing conditions, decorative properties, necessary elasticity and plasticity, transparency or opposite reflection properties, adhesiveness or weldability.
Molds are made according to the type of molding equipment, so it is necessary to be familiar with the performance, specifications, and characteristics of various molding equipment. For example, for an injection machine, the following should be known in terms of specifications: injection capacity, clamping pressure, injection pressure, mold installation size, ejector device and size, nozzle hole diameter and nozzle spherical radius, gate sleeve positioning ring size, The maximum and minimum thickness of the mold, the template stroke, etc., see the relevant parameters for details.
It is necessary to preliminarily estimate the dimensions of the mold and determine whether the mold can be installed and used on the selected injection machine.
6. Mold manufacturing
Once the design is complete, the mold needs to be made. This often involves machining and assembling multiple mold parts to ensure they fit precisely and meet design specifications.
7. Mold testing and adjustment
Before production, the mold needs to be tested to ensure it is functioning properly. This includes injection testing, part quality inspection and mold performance testing. If there is a problem, it needs to be adjusted and fixed.
8. Production and Maintenance
Once the mold is ready, mass production of plastic parts can begin. At the same time, regular maintenance and upkeep is required to ensure that the mold continues to operate efficiently.
Although the mold design is carried out under the expected process conditions when selecting molding materials and molding equipment, people’s understanding is often imperfect. How is the quality. After the discovery is always made, repair the model to eliminate the error.
There are many types of bad phenomena in plastic parts, and the reasons are very complicated. There are reasons for the mold and the reasons for the process conditions. The two are often only combined. Before repairing the mold, a detailed analysis and research should be carried out according to the actual situation of the bad phenomena in the plastic parts, and the remedy methods should be proposed after finding out the reasons for the defects of the plastic parts. Because the molding conditions are easy to change, the general practice is to change the molding conditions first, and only consider repairing the mold when changing the molding conditions cannot solve the problem.
Repairing the mold should be more cautious, and you should not act rashly if you are not very sure. The reason is that once the mold conditions are changed, major modifications and restorations cannot be made.
9. Optimize
Continuous improvement is an important step. By monitoring production processes and part performance, problems can be identified and optimization of molds and production processes can be carried out.
10. Archive the data
After the mold is tested, if it is not used temporarily, the mold release residue, dust, oil, etc. should be completely wiped off, coated with butter or other anti-rust oil or anti-rust agent, and kept in the storage place.
From the design of the mold to the successful mold processing and inspection, the technical data generated during this period, such as task book, part drawing, technical specification, mold assembly drawing, mold part drawing, base map, mold design instruction, inspection record Forms, mold trial and repair records, etc., shall be systematically, bound and numbered according to regulations for filing. This seems like a lot of trouble, but it is very useful to repair the mold in the future and design a new mold.

Mold assembly drawing basic information
(1). Mold forming part structure
(2). Structural form of gating system and exhaust system.
(3). Parting surface and parting pick-up method.
(4). The external structure and all the connecting parts, the location of the positioning and the guiding parts.
(5). Mark the cavity height size (not required, as needed) and the overall size of the mold.
(6). Auxiliary tools (removing mold removal tools, calibration tools, etc.).
(7) List out all the part numbers in sequence, and fill in the detailed list.
(8). Mark the technical requirements and instructions for use.
Technical requirements of the mold assembly drawing
(1). Performance requirements for certain systems of the mold. For example, the assembly requirements for the ejector system and the slider core-pulling structure.
(2). Requirements for mold assembly process. For example, after the mold is assembled, the bonding gap of the bonding surface of the parting surface should not be greater than 0.05mm, the parallelism requirements on the upper and lower sides of the mold, and the size determined by the assembly and the requirements for the size are pointed out.
(3). Mold use, assembly and disassembly method.
(4). Requirements for anti-oxidation treatment, mold numbering, lettering, marking, oil seal, storage, etc.
(5). Requirements for mold trial and inspection.
Many factors affecting the mold structure and individual mold systems
(1). Cavity layout. Determine the number of cavities and their arrangement according to the geometrical characteristics of plastic parts, dimensional accuracy requirements, batch size, mold manufacturing difficulty, and mold cost.
(2). Determine the parting surface. The position of the parting surface should be conducive to mold processing, exhaust, demoulding and molding operations, and the surface quality of plastic parts.
(3). Determine the gating system (shape, position and size of main runner, sub-runner and gate) and exhaust system (exhaust method, location and size of exhaust groove).
(4). Select the ejection method (ejector rod, ejector tube, push plate, combined ejection), and determine the side concave treatment method and core pulling method.
(5). Determine the cooling and heating method, the shape and position of the heating and cooling groove, and the installation position of the heating element.
(6) Determine the thickness and external dimensions of the mold parts, the external structure and the positions of all connections, positioning and guide parts according to the mold material, strength calculation or empirical data.
(7). Determine the structural form of the main molding parts and structural parts.
(8). Considering the strength of each part of the mold, calculate the working size of the molded part.
If the above problems are solved, the structural form of the mold will be solved naturally. At this time, you should start to draw the mold structure sketch to prepare for the formal drawing.
When designing plastic molds, each step requires careful consideration to ensure the final production of high-quality, cost-effective plastic parts. Proper mold design and manufacturing processes can bring success to your project. I hope this article was helpful and gave you a better understanding of the key steps in plastic mold design.


