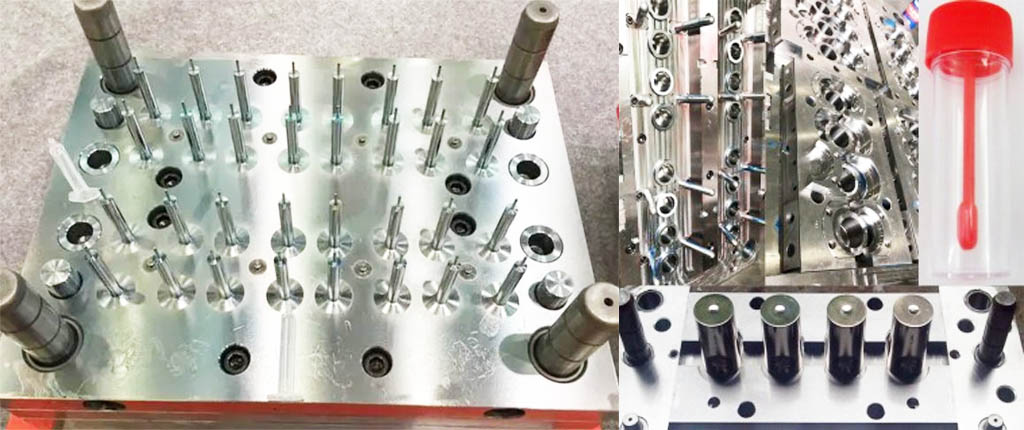
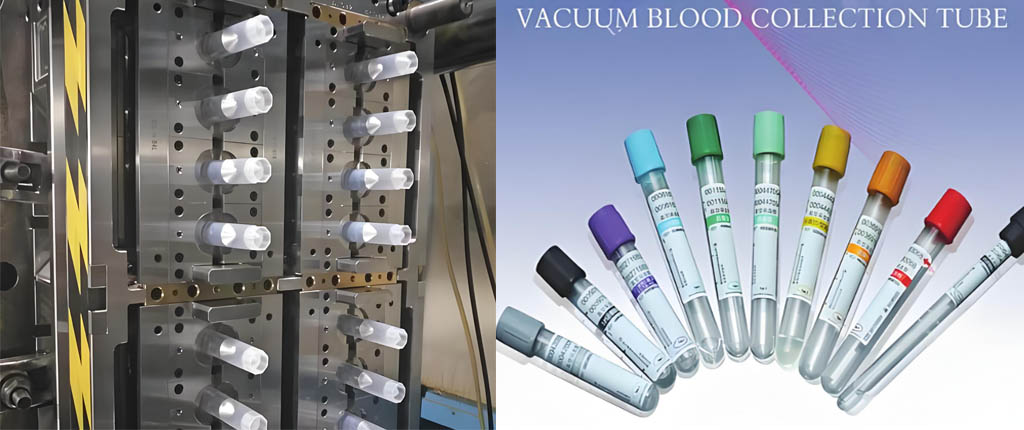
Tips for high quality medical test tube mould,medical test tubes play a crucial role in laboratories and healthcare settings, where precision, reliability, and safety are paramount. Achieving high-quality test tube molds is essential to ensure that these critical tools meet the exacting standards required in the medical field. In this blog, we’ll explore some valuable tips to help you produce top-notch medical test tube moulds.
Table of Contents
ToggleAs one of the common medical consumables, plastic test tubes are used in a large amount. Coupled with the impact of the epidemic, the market demand for test tubes is also increasing day by day, and more and more companies have turned their investment targets to the medical consumables market. So how to make a medical test tube mold? Based on its own medical mold manufacturing experience, WS mold will give you some reference.
To do a high quality medical test tube, you have to make a good test tube mold. The difficulty of making test tube molds lies in a series of problems such as eccentricity, low precision, and low pass rate. Such test tubes cannot meet the technical standards of medical devices.

Tips for high quality medical test tube mould
1. Mold Material Selection
The choice of material for your test tube mould is fundamental. Opt for materials that are compatible with medical-grade plastics, ensuring they meet regulatory requirements for biocompatibility and sterilization. Common mold steel materials made of stainless steel imported from Germany, which greatly increases the life of the mold; the mold base is also changed to high-quality pre-hardened steel, which has higher hardness and better flatness! At the same time, after the core cavity is mirror polished, the surface of the test tube can achieve a higher smoothness.
2. Design for Precision
Precision is key in medical applications. Collaborate closely with design engineers to create a mold design that meets the precise specifications of the medical test tubes. Ensure that features like tube dimensions, threads, and labeling surfaces are meticulously planned.
3. Gate selection of plasstic test tube molds
The more the number of test tube mold cavities, the greater the difficulty coefficient. The molten material in the cavity needs to be cooled quickly after injection molding to avoid eccentricity. Therefore, the temperature control balance of the gate is very critical. The WS test tube mold adopts the self-developed Arnold needle valve hot runner gate with high design precision, and the gate is convenient for rapid injection molding and tight sealing.
4. Surface Finish
A smooth and polished surface finish is vital to avoid imperfections in the test tube, such as scratches or blemishes. Utilize advanced polishing techniques to achieve the desired surface quality, as even minor defects can compromise the functionality of the tubes.
5. Cooling System
Efficient cooling is essential to control the molding process and prevent warping or other defects. Incorporate a well-designed cooling system into your mould to maintain consistent temperatures throughout the production cycle.
The large nozzle cooling system is used to enter and exit the water to achieve rapid cooling, and the melt in the cavity is cooled evenly to avoid the eccentricity problem of the product.
6. Venting
Proper venting is crucial to avoid air entrapment during the molding process. Incomplete filling of the mold can lead to structural weaknesses or defects in the test tubes. Ensure that vents are strategically placed and adequately sized to allow air to escape without compromising the integrity of the tubes.
7. Interchangeable design of Medical Test Tube Mould
Multi-cavity test tube molds can achieve interchangeable functions, which can reduce repeated investment costs and follow-up maintenance costs. The core of WINSEN test tube mold adopts independent self-locking structure, which can realize the exchange of product size, gram weight and wall thickness.
8. Processing equipment for PP and PET test tube molds
The most important thing for the test tube mold is the wall thickness control of the product, which cannot be eccentric. Therefore, the parallelism of each template and the concentricity of the hole position of the insert are very high. The traditional process uses a boring machine, but the accuracy is difficult to control. WINSEN switched to coordinate grinding to ensure the parallelism of template processing and the concentricity of inserts within 0.01mm.
9. Quality Control
Implement stringent quality control measures throughout the production process. Regularly inspect the test tube molds for any signs of wear or damage, and replace components as needed to maintain consistency and quality.
10. Documentation
Maintain comprehensive documentation of your mold design, production processes, and quality control procedures. This documentation is invaluable for traceability and compliance with medical device regulations.

Mold assembly drawing basic information
(1). Mold forming part structure
(2). Structural form of gating system and exhaust system.
(3). Parting surface and parting pick-up method.
(4). The external structure and all the connecting parts, the location of the positioning and the guiding parts.
(5). Mark the cavity height size (not required, as needed) and the overall size of the mold.
(6). Auxiliary tools (removing mold removal tools, calibration tools, etc.).
(7) List out all the part numbers in sequence, and fill in the detailed list.
(8). Mark the technical requirements and instructions for use.
Technical requirements of the mold assembly drawing
(1). Performance requirements for certain systems of the mold. For example, the assembly requirements for the ejector system and the slider core-pulling structure.
(2). Requirements for mold assembly process. For example, after the mold is assembled, the bonding gap of the bonding surface of the parting surface should not be greater than 0.05mm, the parallelism requirements on the upper and lower sides of the mold, and the size determined by the assembly and the requirements for the size are pointed out.
(3). Mold use, assembly and disassembly method.
(4). Requirements for anti-oxidation treatment, mold numbering, lettering, marking, oil seal, storage, etc.
(5). Requirements for mold trial and inspection.
Many factors affecting the mold structure and individual mold systems
(1). Cavity layout. Determine the number of cavities and their arrangement according to the geometrical characteristics of plastic parts, dimensional accuracy requirements, batch size, mold manufacturing difficulty, and mold cost.
(2). Determine the parting surface. The position of the parting surface should be conducive to mold processing, exhaust, demoulding and molding operations, and the surface quality of plastic parts.
(3). Determine the gating system (shape, position and size of main runner, sub-runner and gate) and exhaust system (exhaust method, location and size of exhaust groove).
(4). Select the ejection method (ejector rod, ejector tube, push plate, combined ejection), and determine the side concave treatment method and core pulling method.
(5). Determine the cooling and heating method, the shape and position of the heating and cooling groove, and the installation position of the heating element.
(6) Determine the thickness and external dimensions of the mold parts, the external structure and the positions of all connections, positioning and guide parts according to the mold material, strength calculation or empirical data.
(7). Determine the structural form of the main molding parts and structural parts.
(8). Considering the strength of each part of the mold, calculate the working size of the molded part.
If the above problems are solved, the structural form of the mold will be solved naturally. At this time, you should start to draw the mold structure sketch to prepare for the formal drawing.
When designing plastic molds, each step requires careful consideration to ensure the final production of high-quality, cost-effective plastic parts. Proper mold design and manufacturing processes can bring success to your project. I hope this article was helpful and gave you a better understanding of the key steps in plastic mold design.


